
Block layout software by Crea'bloc
You draw the wall.
CREASoft places every block, course by course.
Draw the layout of your Crea'bloc block wall. The software spreads the blocks over each course with staggered joints, shows you the wall in 3D and prints the site file with the exact list of blocks to order.
For Windows and macOS (Apple Silicon Mac, macOS 13 or later). The software itself is in French.
The four steps
-
1
Draw
You draw the centre line of the walls on a grid, or over a scanned plan brought to scale.
-
2
Generate
One click, and every wall fills up with the blocks you have allowed.
-
3
Check in 3D
You walk around the wall, add dimensions and take pictures.
-
4
Print
The PDF file goes to the customer or to the site: list of blocks and a laying plan for each course.
A plan that keeps its dimensions while you edit it
Put rules on the drawing: this wall stays vertical, these two stay parallel, that one is 10 m long. Then, when you drag a corner or stretch a façade, the rest of the plan follows on its own and every rule still holds.
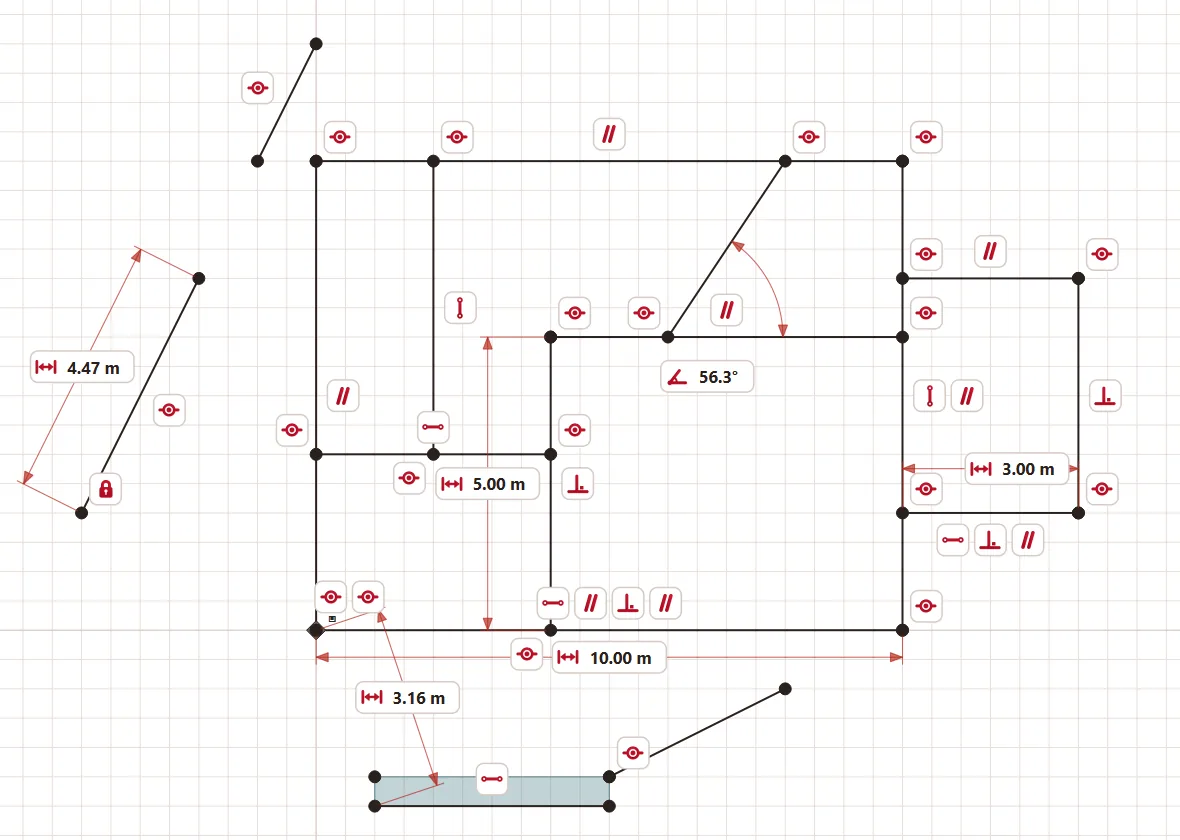
The eight plan rules
 Horizontalmakes a line horizontal, or lines up points.
 Verticalthe same, vertically.
 Fixlocks a point, a line or a wall in place.
 Coincidentjoins two points, or lets a point slide along a wall.
 Parallelkeeps two walls parallel.
 Perpendicularkeeps two walls square.
 Lengthsets a length or a distance, in metres.
 Anglesets the angle between two walls, in degrees.
If a move would break a rule, CREASoft says the position is impossible and leaves the plan as it was.
The magnet
Points snap to the grid, to wall ends and to crossings. Corners close cleanly.
The background plan
Import the architect's plan or an aerial view, set the scale with two clicks on a known dimension, then draw on top.
Each wall set line by line
Height in number of blocks, flat top, stepped wall, blocks allowed on this line: everything is set in the right-hand panel.
The block layout done for you, course by course
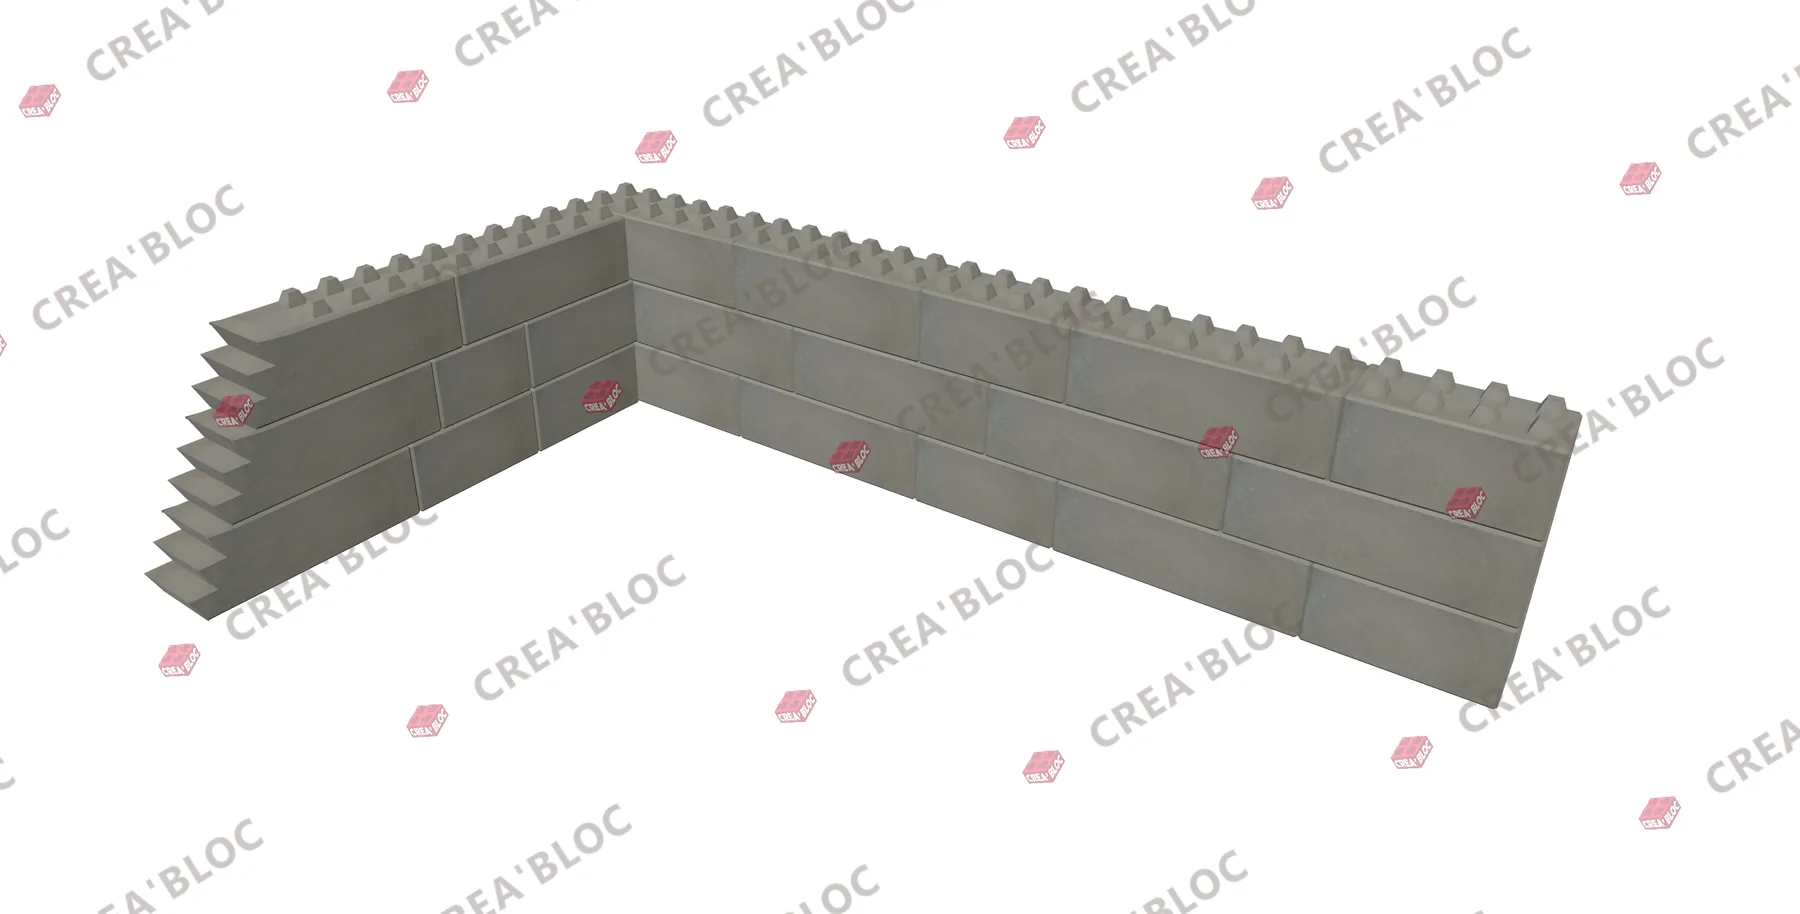
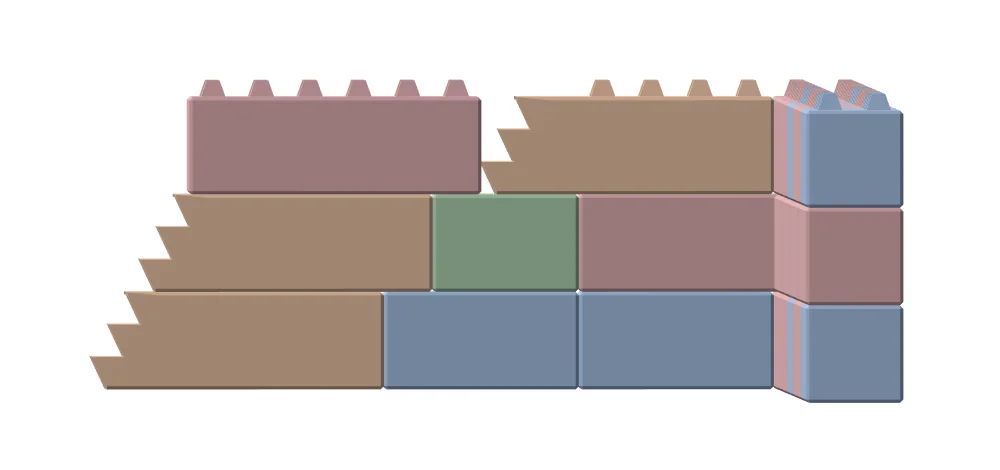
The layout is the choice and position of every block. CREASoft works it out course by course. It uses the blocks you ticked for the project, staggers the joints from one course to the next so the wall holds together, and leaves the gaps needed at corners and T-junctions.
Simplified example to show the idea. In the software, the layout follows your plan, your corners and your block catalogue.
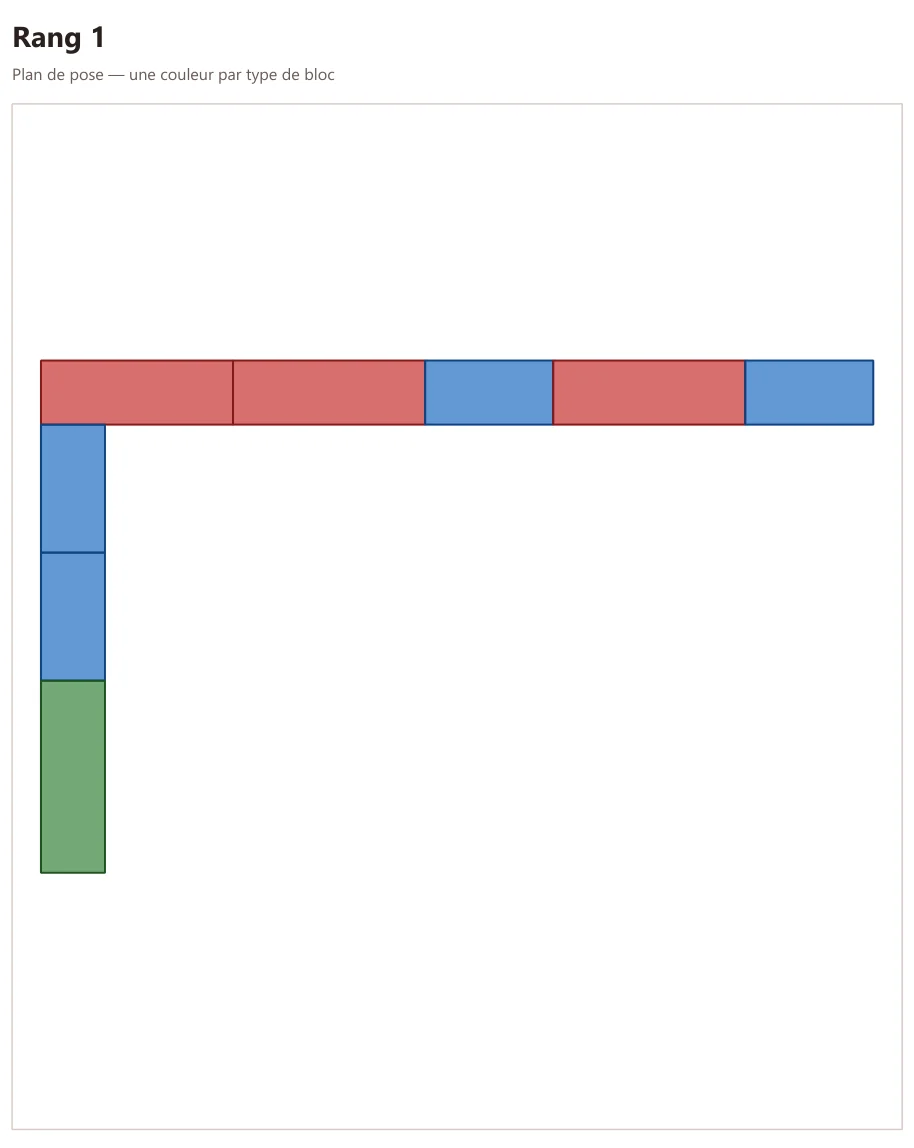
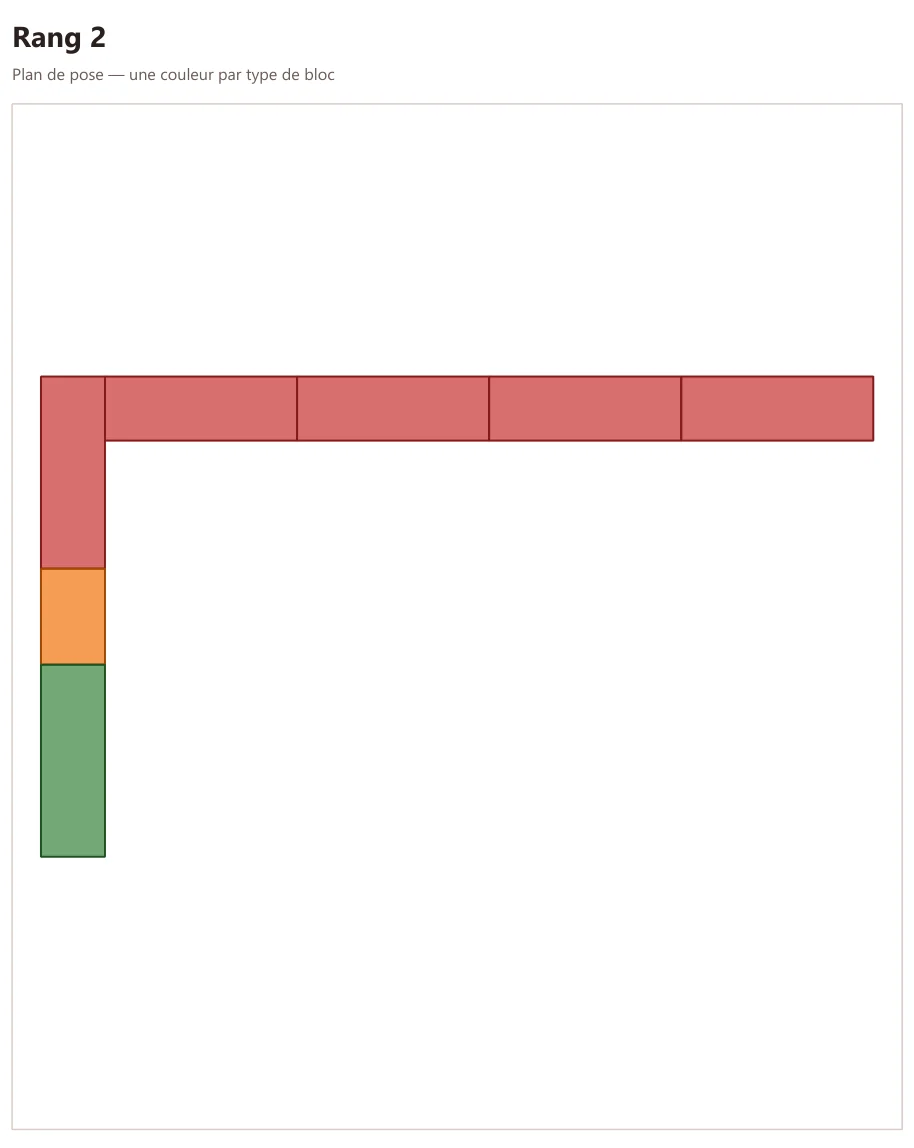
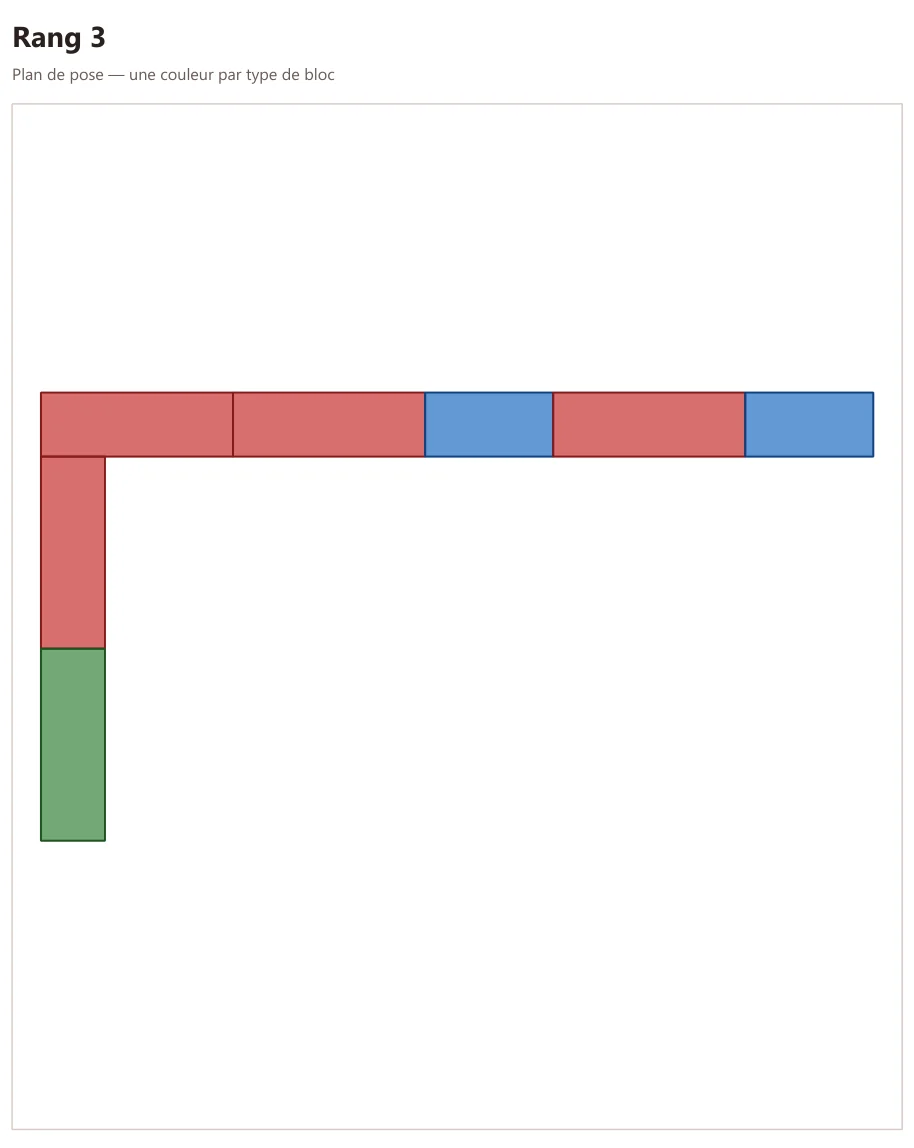
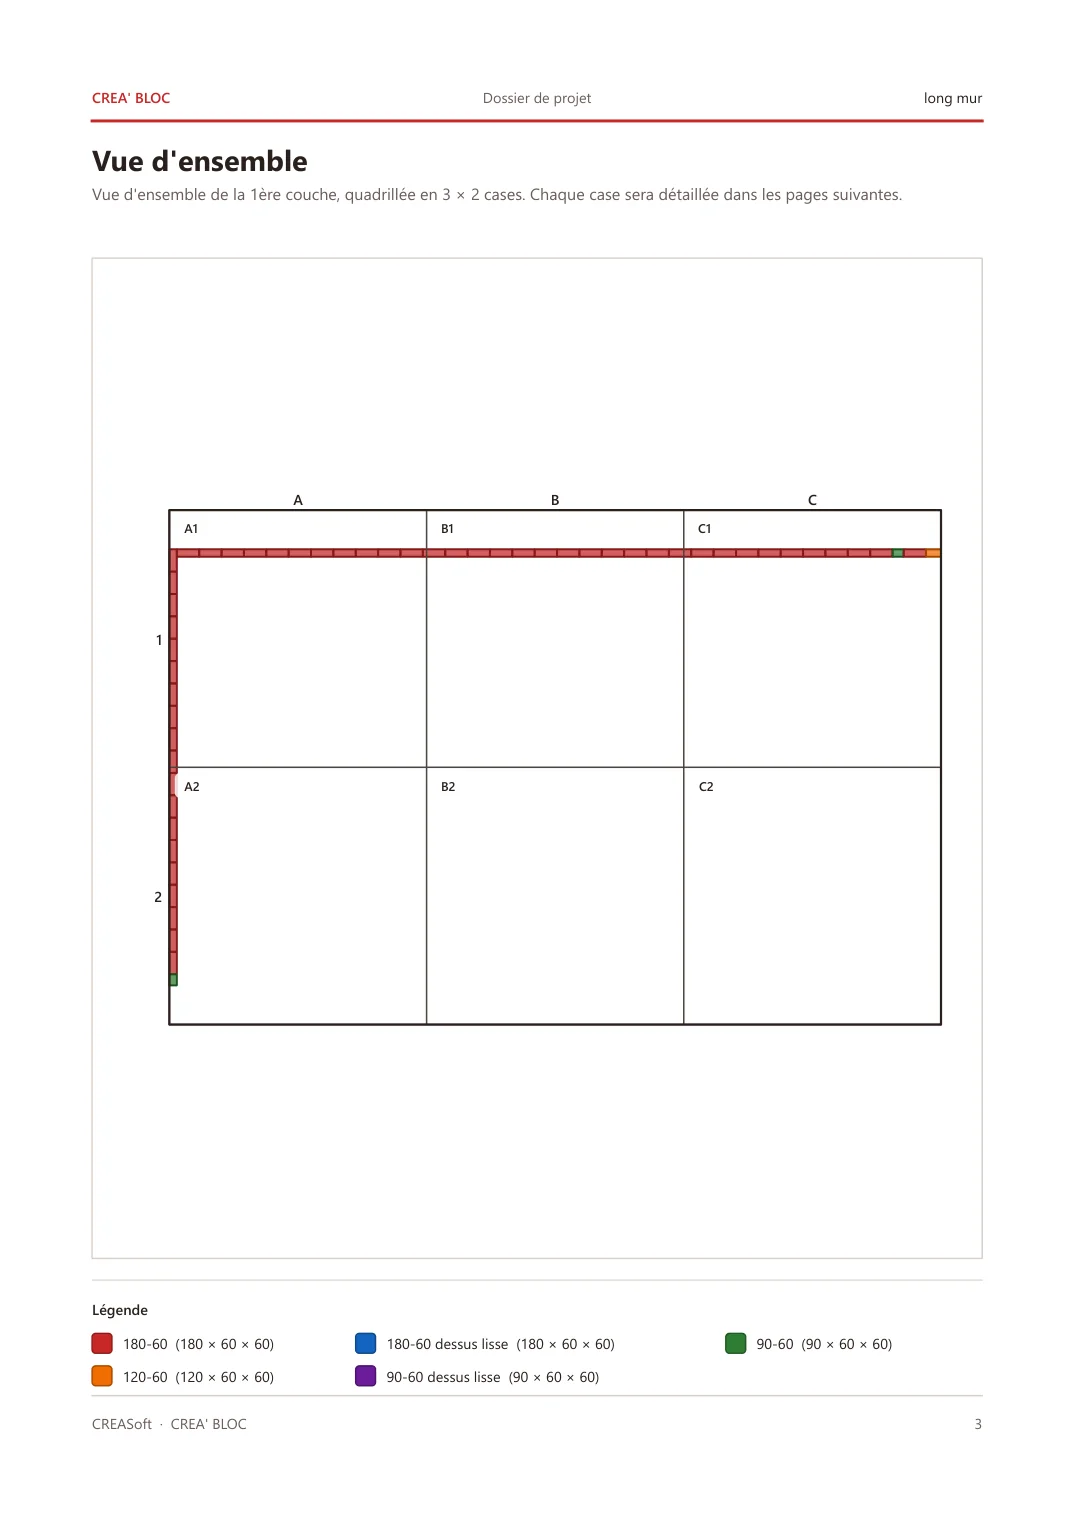
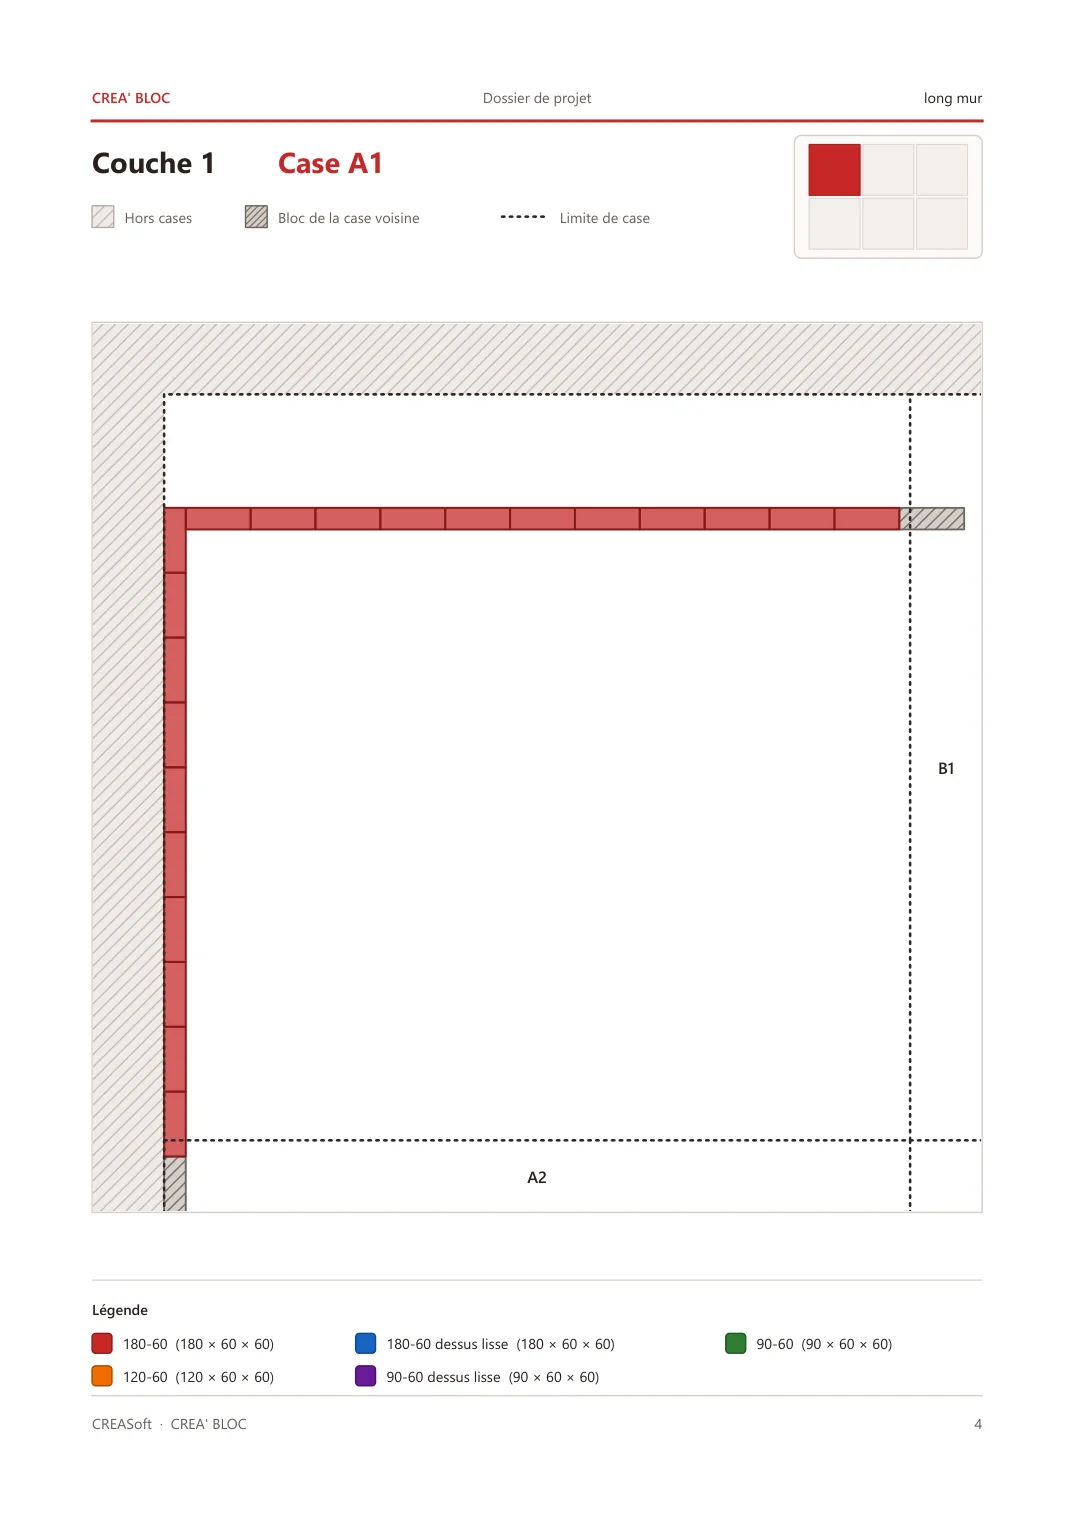
The same L-shaped wall, course by course, as it comes out in the PDF file (in French). One colour per block type.
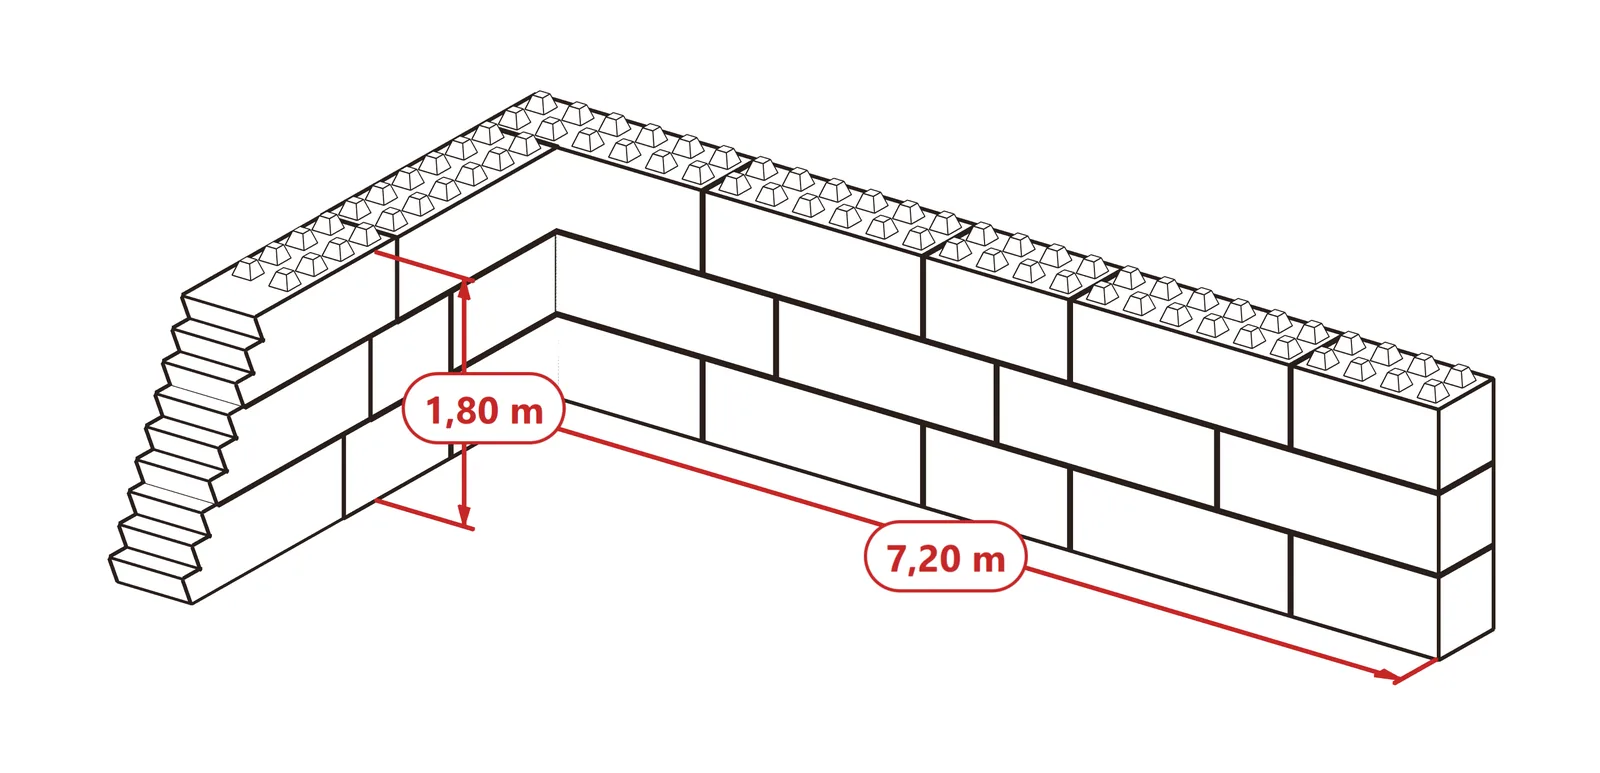
The wall in 3D, before the first block is laid
Turn around the wall with the mouse, zoom in on a corner, check a height. The block count stays on screen in a corner. Length and height dimensions go wherever you want, and every view can be saved as a picture, up to 4K.
A site file ready to print
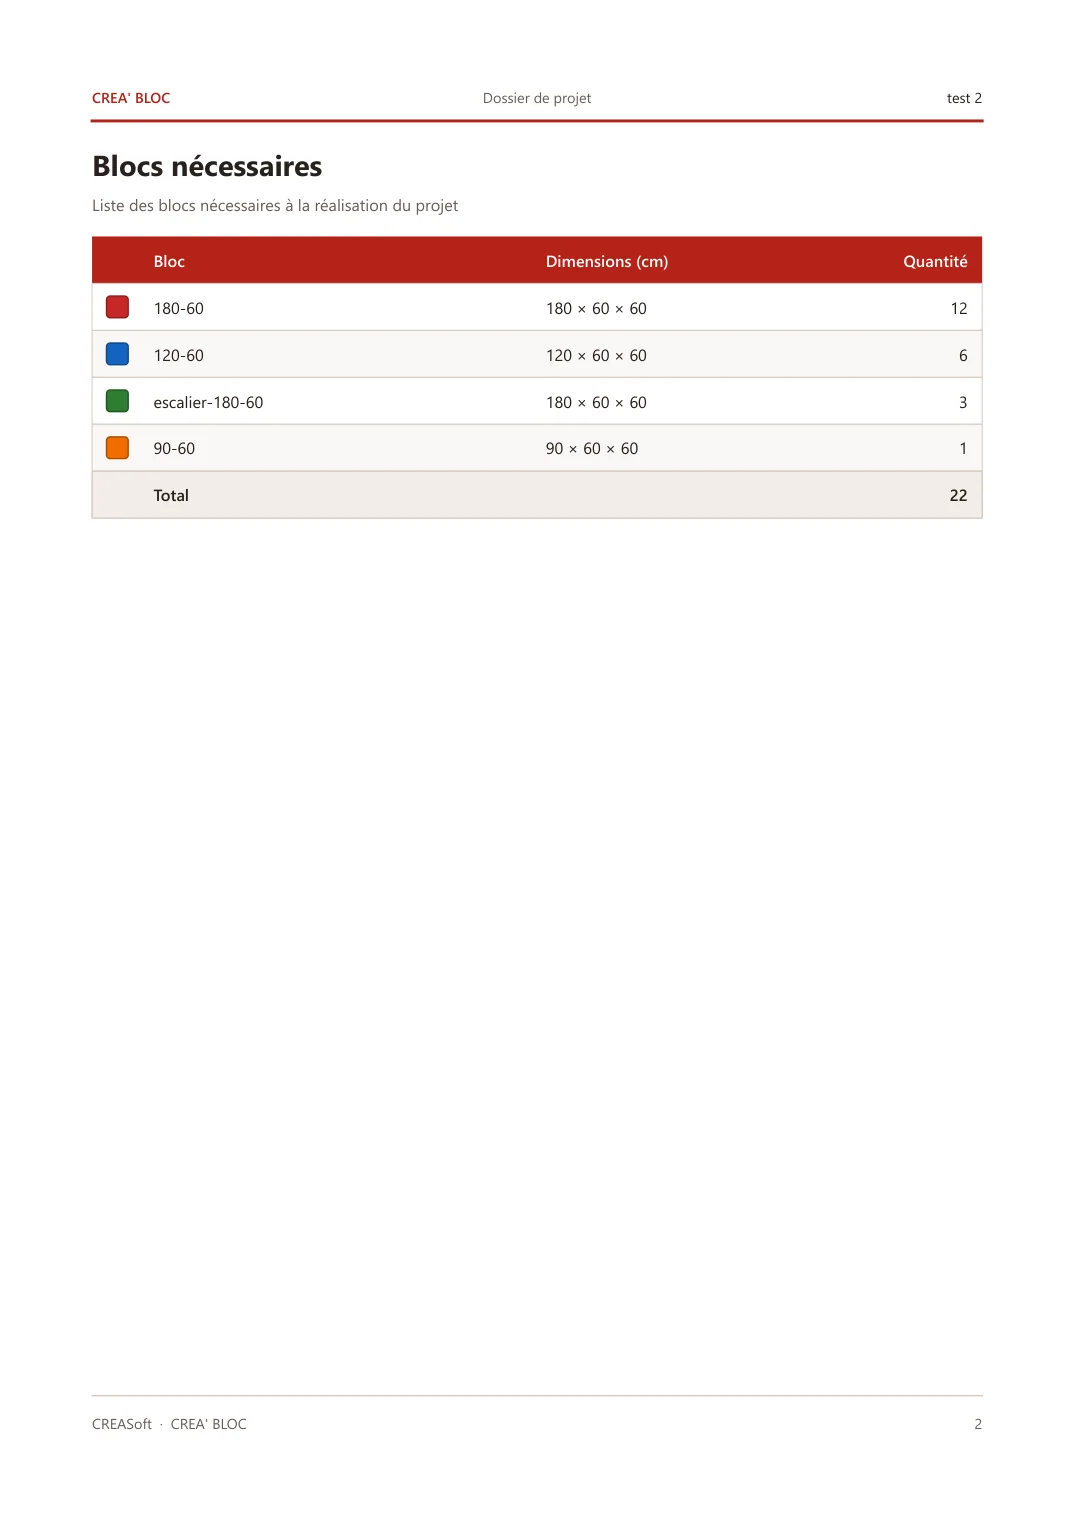
At the end, CREASoft produces a PDF named after the project. Send it to the customer with the quote, leave it with the builder on site.
- Cover page
- Project name, date, your contact details and the 3D picture of your choice.
- Blocks needed
- Each block type, its size in centimetres and the quantity, with the total.
- One plan per course
- The laying plan seen from above, one colour per block type, and the legend.
- Large projects
- Beyond a length you choose, an overview split into squares, then the detail of each square.
Your blocks, your sizes
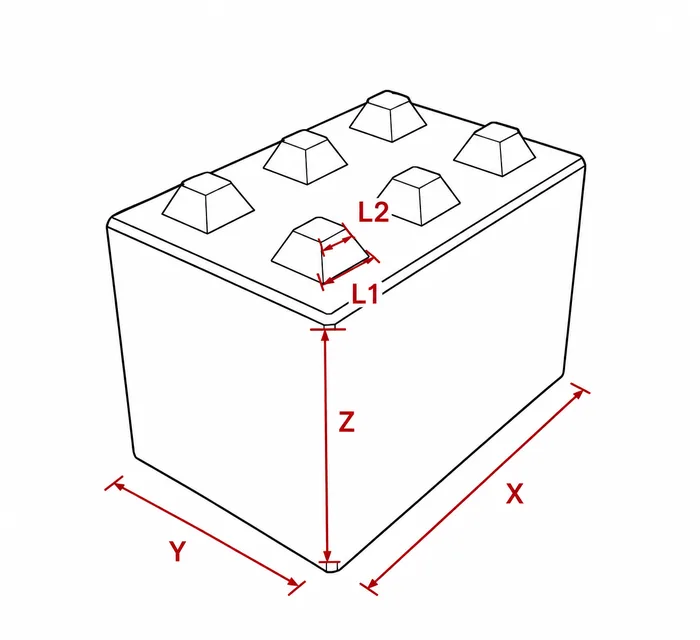
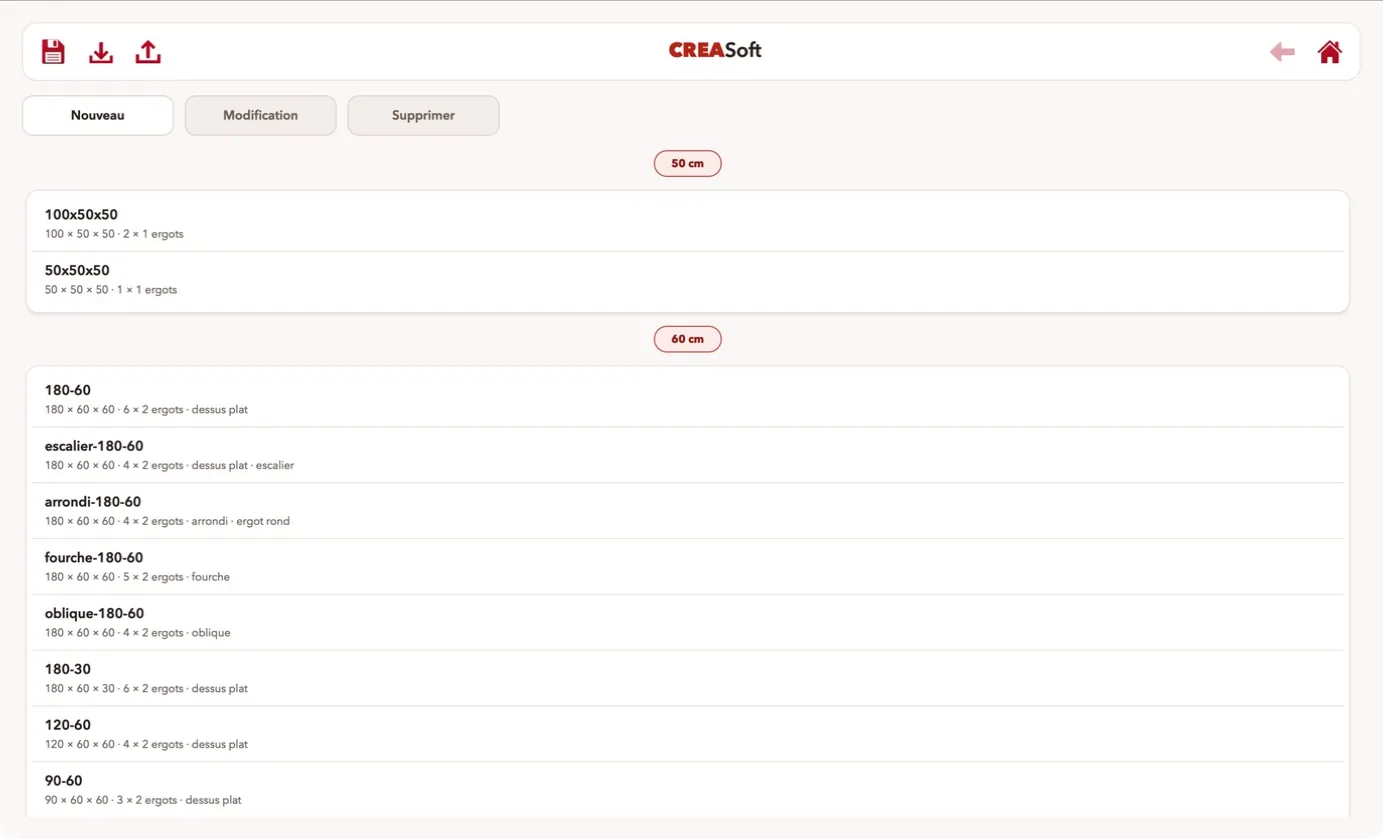
CREASoft works from your inventory: blocks sorted by wall thickness, with their sizes and their studs. Add a size, change one, export the catalogue to hand it to a colleague.
Special blocks
For wall ends and openings, four shapes are drawn in the editor, which shows a preview as you type the sizes.
- RoundedHalf-round end, adjustable round stud.
- Fork pocketOne or two pockets for the forks, adjustable width and spacing.
- StairTread and riser of your choice.
- AngledBevelled cut, adjustable diagonal length.
Surface patterns
A pattern covers the face of the wall with a photo, for example a rubble stone finish. The wall then shows in 3D with that pattern instead of its joints.
Specifications
| Computers | Windows 10 and 11. macOS 13 or later, on Apple Silicon Macs (M1 and later). |
|---|---|
| Units | Plan in metres, blocks in centimetres, angles in degrees. |
| Plan rules | Horizontal, vertical, fix, coincident, parallel, perpendicular, length, angle. |
| Special blocks | Rounded, fork pocket, stair, angled. |
| 3D views | Sketch, colour, realism. Movable length and height dimensions. |
| Pictures | SD, HD, Full HD, 2K or 4K, kept in a gallery for each project. |
| Site file | PDF: cover page, blocks needed, one laying plan per course, overview split into squares for long walls. |
| Files | One .projet file per project, opened with a double click. Inventory export as an .inv file. |
| Comfort | Undo and redo everywhere (Ctrl+Z, Ctrl+Y). Illustrated guide built into the software, in thirteen parts. |
| Language | The software and its guide are in French. |
| Version | 1.10.22 |
Frequently asked questions
Is the software available in English?
Not yet: the screens, the guide and the PDF file are in French.
Do I need to know how to use drawing software?
No. You draw a wall with two clicks, the magnet closes the corners, and an illustrated guide is built into the software, from opening a project to printing the file.
Does it work on a Mac?
Yes, on Apple Silicon Macs (M1 and later) with macOS 13 or later.
Can I add my own block sizes?
Yes. The inventory can be edited: you enter the three sizes in centimetres and the studs, or you create a special block (rounded, fork pocket, stair, angled). New blocks then appear in your project settings.
How does the software choose the blocks?
For each project, you choose the wall thickness and tick the blocks allowed. You can even limit the blocks wall by wall. CREASoft only lays those, staggering the joints from one course to the next.
Can I start from an existing plan?
Yes. Import a picture of the plan, give a known length to bring it to scale, then draw the walls on top.
What is in the PDF file?
A cover page with the chosen 3D picture, the list of blocks needed with their quantities, then one laying plan per course. For a long wall, an overview split into squares and the detail of each square.
Where are my projects saved?
On your computer: each project is a .projet file holding the plan, the settings and the pictures. PDF files and pictures go into a docs_CREASoft folder, under each project's name.
Who am I?
My name is Yann Royer. I design and develop CREASoft, from the first line of the plan to the PDF file. So if you have a question, an idea or a problem with the software, you talk to me directly.
See CREASoft at work
Write to me or call me for a demo, or to hear when subscriptions open.
Pricing
CREASoft will be offered as a subscription.
Pricing coming soon.
Contact me
- Phone +33 7 69 18 44 22
- E-mail royer.yann@free.fr